As a crazy Creative Zen fan, I have used Creative Zen for almost a year and in order to help Creative Zen user to know how to add DVD and video on Creative Zen, I spent few hours to write this guide.
It includes two parts:
Part 1. How to put DVD on your Creative Zen
Part 2. How to put video on your Creative Zen
Preparation:
Actually, Creative Zen can only play 4 kinds of video format (MJPEG, WMV9, MPEG4-SP, and AVI), so you can not put DVD and other video on Creative Zen and play them. If you want to enjoy your DVD on your Creative Zen you have to convert them into Zen supptorted video format.
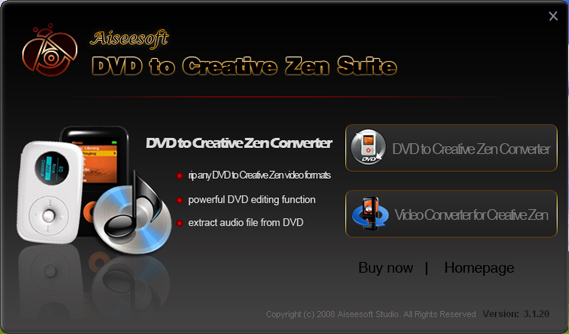
Here I recommend you Aiseesoft http://www.aiseesoft.com/dvd-to-creative-zen-suite.html (DVD to Creative Zen Suite).It contains a http://www.aiseesoft.com/dvd-to-creative-zen-converter.html (DVD to Creative Zen Converter) and a http://www.aiseesoft.com/video-converter-for-creative-zen.html (Video Converter for Creative Zen)
(IMAGE: http://www.aiseesoft.com/images/guide/creative-zen-suite/start.jpg)
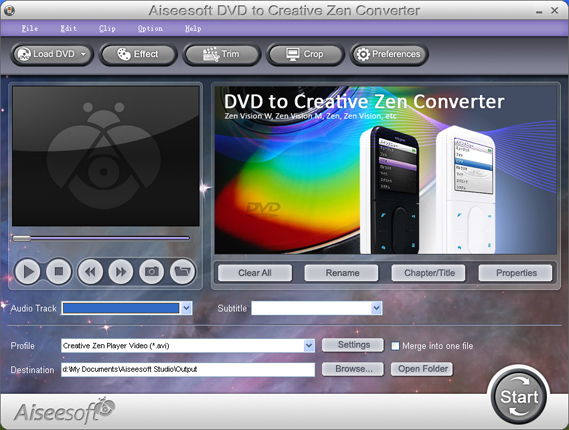
Part 1. How to put DVD on your Creative Zen
(IMAGE: http://www.aiseesoft.com/images/guide/creative-zen-suite/dvd.jpg)
Step 1. Load DVD
Click "Load DVD" button or "File" to choose load DVD (You can also choose load DVD folder and load IFO fiel)
Step 2. Video settings
Select the output video format you need from the "Profile" drop-down list. Click "Settings" button to set your video and audio parameters.
Step 3. More Functions
You can also do trim, crop and effect DVD, merge your selected chapters into one file, capture your favorite pictures
After doing the above 3 steps you can click "Start" button to start your conversion.
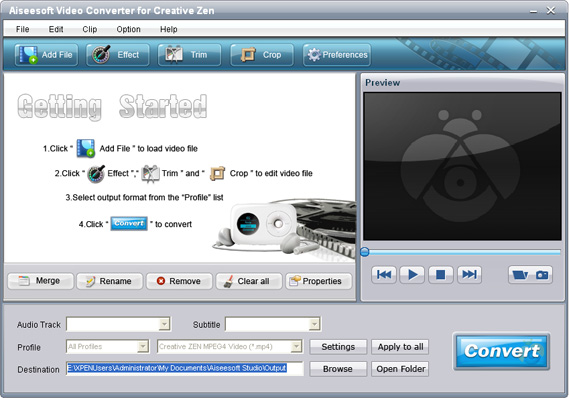
Part 2. How to put video on your Creative Zen
(IMAGE: http://www.aiseesoft.com/images/guide/creative-zen-suite/video.jpg)
Step 1. Add Video
You can add you video that you want to convert by clicking "Add File" or "File" to chosse "Add File"
Step 2. Settings and Output Format
From the "Profile" drop-down list you can find one format that meets your requirement. To have your own video settings you can click "settings" button.
OK, click the "Start" button to begin your conversion.
Tips:
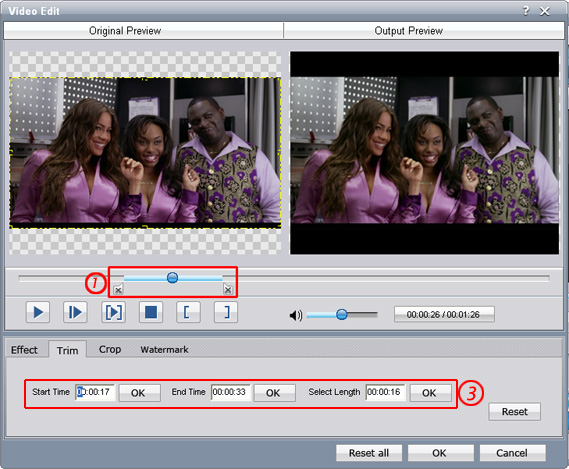
1. Trim
There are 3 ways that you can trim your video.
a. You can drag the buttons(1) to set the start and end time
b. You can preview the video first and when you want to start trim click the left one of the pair buttons (2) when you want to end click the right one.
c. You can set the exact start and end time on the right side of the pop-up window.
(IMAGE: http://www.aiseesoft.com/images/guide/creative-zen-suite/trim.jpg)
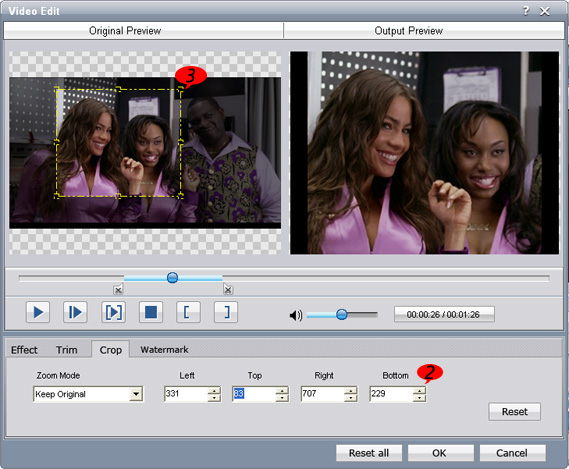
2. Crop
There are 3 ways that you can crop your video.
a. We provide 7 modes on our "Crop Mode"(1)
b. You can set your own mode on the right side of the pop-up window(2)
c. You can drag frame to set your own crop mode(3)
(IMAGE: http://www.aiseesoft.com/images/guide/creative-zen-suite/crop.jpg)
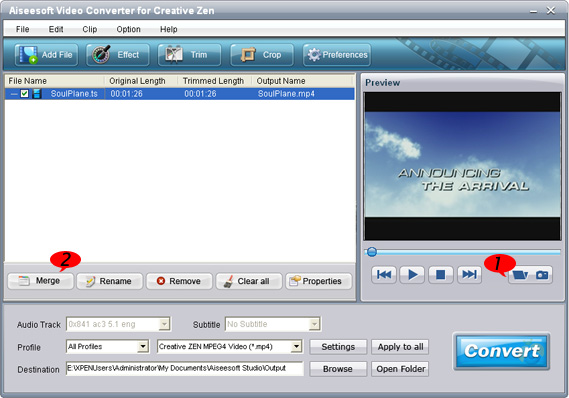
3. Snapshot and merge into one file
If you like the current image of the video you can use the "Snapshot" option. Just click the "Snapshot" button the image will be saved and you can click the "Open" button next to "Snapshot" button to open your picture. (1)
If you want to make several files output as one you can choose "Merge into one file". (2)
(IMAGE: http://www.aiseesoft.com/images/guide/creative-zen-suite/merge.jpg)
Subscribe to:
Post Comments (Atom)

No comments:
Post a Comment